

Video Calling in Flutter
Easily add video call with minimum lines of code


Introduction:
Don't have time to introduce video calling in your app from scratch? Don't worry. This blog is made for you.
Learn to integrate video calling with a few lines of code within 30 minutes.
Not believing it? No problem. Just go through the blog. You will learn easily.
Video call: zegocloud.com/product/video-call
Setup and Configuration:
Create a basic project in Flutter (name like: video_meet).
Add Packages
Go to the
pubspec.yamlfile of your project.Under the
dependenciessection, add the following three packages:
Add
.envfileMake a file named as
.envat the root of your project.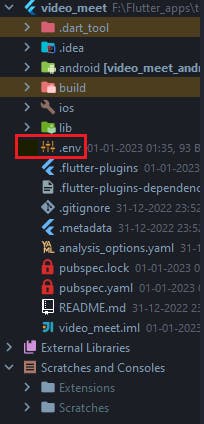
Go to the ZegoCloud Admin Dashboard and an account. Then add
appIdandappSignKeyin.envfile. But how to do that? Don't worry. Click on the following video to see particularly the steps:Open
.gitignorefile and write.env..envfile contains secret information. So we are adding this file under.gitignoreso that it will not add to the version control in the future.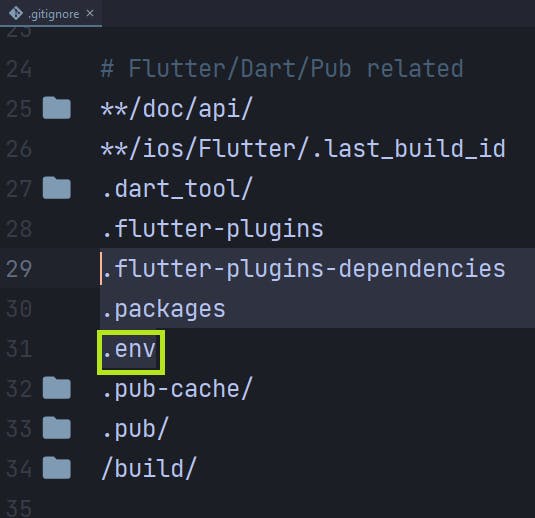
Include
.envfile under the assets section ofpubspec.yamlfile. That will load as assets when we run the project.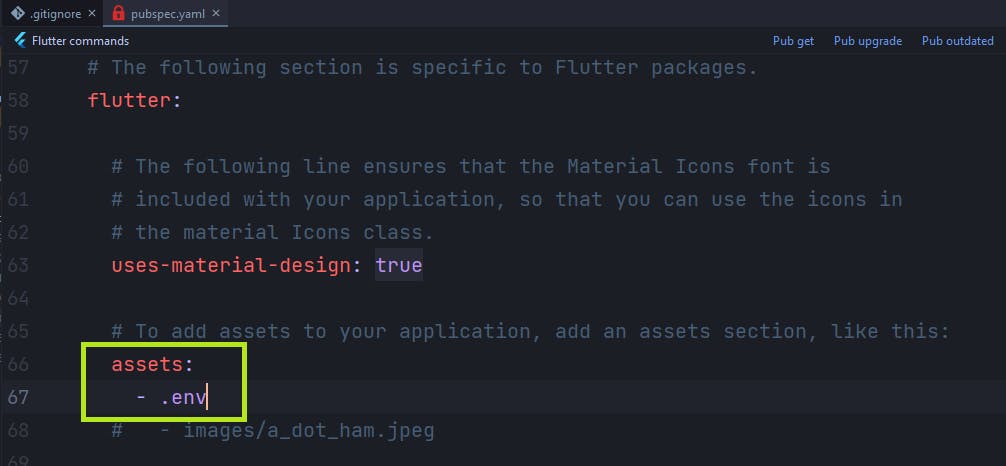
Add Permissions under the main AndroidManifest.xml file
 <uses-permission android:name="android.permission.ACCESS_WIFI_STATE" /><uses-permission android:name="android.permission.RECORD_AUDIO" />
 <uses-permission android:name="android.permission.INTERNET" />
 <uses-permission android:name="android.permission.ACCESS_NETWORK_STATE" />
 <uses-permission android:name="android.permission.CAMERA" />
 <uses-permission android:name="android.permission.BLUETOOTH" />
 <uses-permission android:name="android.permission.MODIFY_AUDIO_SETTINGS" />
 <uses-permission android:name="android.permission.WRITE_EXTERNAL_STORAGE" />
 <uses-permission android:name="android.permission.READ_PHONE_STATE" /><uses-permission android:name="android.permission.WAKE_LOCK" />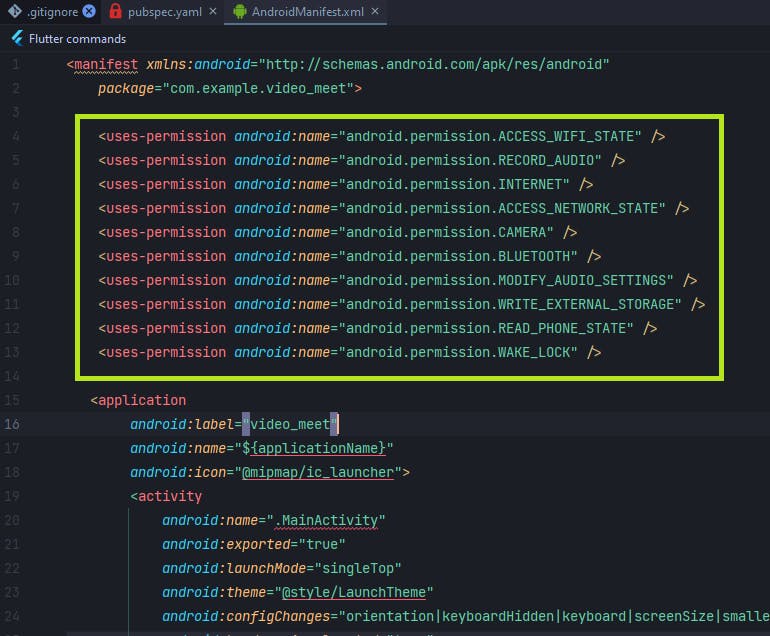
Go to the android -> app -> build.gradle, and change the following
 compileSdkVersion 33
 minSdkVersion 24
 targetSdkVersion 33
Under the buildTypes->release of that file, add the following line:
 minifyEnabled true
 proguardFiles getDefaultProguardFile('proguard-android.txt'), 'proguard-rules.pro'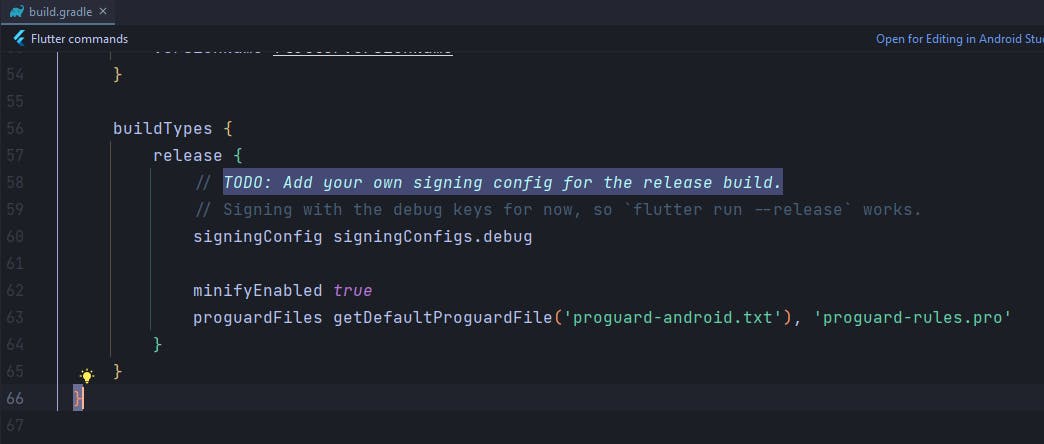
Under the android->app, make a file name as
proguard-rules.proWrite the following line under that file
-keep class **.zego.** { *; }
Screen Making and Functionality Integration:
Go the
main.dartfile under thelibfolder.Delete all the things and paste the following code:-
 import 'package:flutter/material.dart';
 import 'package:video_meet/data_management.dart';

 import 'main_screen.dart';

 void main() async{
   await DataManagement.loadEnvData;
   runApp(const EntryRoot());
 }

 class EntryRoot extends StatelessWidget {
   const EntryRoot({Key? key}) : super(key: key);

   @override
   Widget build(BuildContext context) {
     return MaterialApp(
       debugShowCheckedModeBanner: false,
       title: 'ZegoCloud Testing',
       builder: (context, child) => MediaQuery(
         data: MediaQuery.of(context).copyWith(textScaleFactor: 1.0),
         child: child!,
       ),
       home: const MainScreen(),
     );
   }
 }
👉 Explanation: Under the
runApp(), we are calling theStatelessclassEntryRoot, where the common entry of every Flutter project exists. Very easy to understand.Now create a file name as
main_screen.dart. Paste the following code in that file.import 'package:flutter/material.dart'; import 'package:flutter/services.dart'; import 'package:permission_handler/permission_handler.dart'; import 'package:video_meet/video_call.dart'; class MainScreen extends StatefulWidget { const MainScreen({Key? key}) : super(key: key); @override State<MainScreen> createState() => _MainScreenState(); } class _MainScreenState extends State<MainScreen> { _beautifyScreen( {Color navigationBarColor = Colors.white, Color statusBarColor = Colors.transparent, Brightness? statusIconBrightness = Brightness.dark, Brightness? navigationIconBrightness = Brightness.dark}) { SystemChrome.setSystemUIOverlayStyle(SystemUiOverlayStyle( systemNavigationBarColor: navigationBarColor, // navigation bar color statusBarColor: statusBarColor, // status bar color statusBarIconBrightness: statusIconBrightness, systemNavigationBarIconBrightness: navigationIconBrightness, )); } @override void initState() { _beautifyScreen(); super.initState(); } @override Widget build(BuildContext context) { return Scaffold( body: SizedBox( width: MediaQuery.of(context).size.width, height: MediaQuery.of(context).size.height, child: Column( mainAxisAlignment: MainAxisAlignment.center, children: [ _commonButton('Start a Meeting', () { _joinMeeting( meetId: 'video_call_${DateTime.now().microsecondsSinceEpoch}'); }), const SizedBox(height: 30), _commonButton('Join Meeting', _joinMeeting), ], ), ), ); } _commonButton(String btnText, VoidCallback onTap) { return ElevatedButton( onPressed: onTap, style: ElevatedButton.styleFrom( backgroundColor: const Color(0xff0155FE), padding: const EdgeInsets.symmetric(horizontal: 30, vertical: 10), shape: RoundedRectangleBorder( borderRadius: BorderRadius.circular(8), )), child: Text( btnText, style: const TextStyle(fontSize: 18, color: Colors.white), )); } void _joinMeeting({String meetId = ''}) async { final Map<Permission, PermissionStatus> _permissionStatuses = await [ Permission.camera, Permission.microphone, ].request(); final _permissionResultMap = _permissionStatuses.map((key, value) => MapEntry(key, value.isGranted)); final _allPermissionResult = _permissionResultMap.values.toList(); if (_allPermissionResult.contains(false)) { ScaffoldMessenger.of(context).showSnackBar( const SnackBar(content: Text('All Permission Need to Proceed'))); return; } final TextEditingController _meetIdController = TextEditingController(); final TextEditingController _userNameController = TextEditingController(); _joinContentWidget() { return Container( width: MediaQuery.of(context).size.width, height: meetId.isEmpty ? 300 : 100, margin: const EdgeInsets.symmetric(vertical: 15), child: Column( children: [ if (meetId.isEmpty) TextFormField( controller: _meetIdController, cursorColor: const Color(0xff424242), decoration: InputDecoration( enabledBorder: _commonBorder, focusedBorder: _commonBorder, border: _commonBorder, filled: true, hintText: 'Meeting Id', fillColor: const Color(0xFFF3F2F2), contentPadding: const EdgeInsets.symmetric( vertical: 17, horizontal: 15), )), const SizedBox( height: 30, ), TextFormField( controller: _userNameController, cursorColor: const Color(0xff424242), decoration: InputDecoration( enabledBorder: _commonBorder, focusedBorder: _commonBorder, border: _commonBorder, filled: true, hintText: 'User Name', fillColor: const Color(0xFFF3F2F2), contentPadding: const EdgeInsets.symmetric(vertical: 17, horizontal: 15), )), ], ), ); } showDialog( context: context, builder: (_) => StatefulBuilder( builder: (_, __) => AlertDialog( insetPadding: const EdgeInsets.symmetric(horizontal: 10), shape: RoundedRectangleBorder( borderRadius: BorderRadius.circular(12)), title: _joinTitle(), content: _joinContentWidget(), actionsAlignment: MainAxisAlignment.center, actions: [ _commonButton("Let's Join", () { if (meetId.isEmpty && _meetIdController.text.isEmpty) { return; } final _confId = meetId.isEmpty ? _meetIdController.text : meetId; Navigator.of(context).push(MaterialPageRoute( builder: (_) => VideoMeetScreen( conferenceId: _confId, userName: _userNameController.text, userId: DateTime.now() .microsecondsSinceEpoch .toString()))); }), ], ))); } _joinTitle() { return const Center( child: Text( 'Enter Meeting Id', style: TextStyle(fontSize: 25, fontWeight: FontWeight.w400), ), ); } get _commonBorder => OutlineInputBorder( borderRadius: const BorderRadius.all(Radius.circular(12)), borderSide: BorderSide( color: const Color(0xff424242).withOpacity(0.4), width: 2), ); }👉 Explanation:
Make a Stateful Widget name as
MainScreen.From the
initstate, call_beautifyScreen(), use to beautify screen layout(Optional).Under the
buildmethod, make aColumnwidget with two common buttons for Start Meeting and Join Meeting.First focus on what happens when we click two buttons.
When Join Meeting, a meeting id, and username are required. Take that two pieces of information from the user and with that, we will join the meeting.
When clicking on Start Meeting, only username we have to take. As the new fresh room is going to create, we have to give a new unique confId.
So, generate a unique id with epoch time as it is always unique.
Generate a unique confId with the following code:
  final _confId = 'video_call_${DateTime.now().microsecondsSinceEpoch}';
  // That _confId will unique everytime.
Create a file name as
data_management.dart. Add the following code to that file.import 'package:flutter_dotenv/flutter_dotenv.dart'; class DataManagement{ static get loadEnvData async => await dotenv.load(fileName: ".env");/// MAke Sure There is a file named as '.env' in root dir static String? getEnvData(String key) => dotenv.env[key]; static get getAppId => getEnvData('appID'); static get getAppSigningKey => getEnvData('appSignKey'); }Explanation:
loadEnvData is used for loading
.envfile, when the project starts. That's why it's called fromvoid main()atmain.dartfile.getEnvData is used for getting the value from the
.envfile with the proper key name mentioned in.envfile.getAppId is used for getting the value
appIdmentioned in.envfile.getAppSigningKey is used for getting the value
appSignKeymentioned in.envfile.
Now create the last file for that project name as
video_call.dartand paste the following code.import 'package:flutter/material.dart'; import 'package:flutter/services.dart'; import 'package:video_meet/data_management.dart'; import 'package:zego_uikit_prebuilt_video_conference/zego_uikit_prebuilt_video_conference.dart'; class VideoMeetScreen extends StatelessWidget { final String conferenceId; final String userName; final String userId; const VideoMeetScreen( {Key? key, required this.conferenceId, required this.userName, required this.userId}) : super(key: key); @override Widget build(BuildContext context) { return SafeArea( child: ZegoUIKitPrebuiltVideoConference( appID: int.parse(DataManagement.getAppId), appSign: DataManagement.getAppSigningKey, conferenceID: conferenceId, userID: userId, userName: userName, config: ZegoUIKitPrebuiltVideoConferenceConfig( turnOnCameraWhenJoining: false, turnOnMicrophoneWhenJoining: false, useSpeakerWhenJoining: true, leaveConfirmDialogInfo: ZegoLeaveConfirmDialogInfo( title: "Leave the conference", message: "Are you sure to leave the conference?", cancelButtonName: "Cancel", confirmButtonName: "Confirm", ), topMenuBarConfig: ZegoTopMenuBarConfig( buttons: [ ZegoMenuBarButtonName.showMemberListButton, ZegoMenuBarButtonName.chatButton ], ), bottomMenuBarConfig: ZegoBottomMenuBarConfig(buttons: [ ZegoMenuBarButtonName.toggleCameraButton, ZegoMenuBarButtonName.toggleMicrophoneButton, ZegoMenuBarButtonName.switchAudioOutputButton, ZegoMenuBarButtonName.leaveButton, ZegoMenuBarButtonName.switchCameraButton, ], extendButtons: [ ElevatedButton( style: ElevatedButton.styleFrom( fixedSize: const Size(60, 60), shape: const CircleBorder(), backgroundColor: const Color(0xff2C2F3E).withOpacity(0.6), ), child: const Icon(Icons.copy), onPressed: () async { await Clipboard.setData(ClipboardData(text: conferenceId)); Navigator.pop(context); ScaffoldMessenger.of(context).showSnackBar(const SnackBar( content: Text('MeetId Copied to clipboard'))); }, ) ])), ), ); } }Explanation:
Under that file first, create a stateless widget that will take three params
conferenceIduserNameuserId
That class will be navigated from
Let's Jointhe method undermain_screen.dartfile. Don't worry, you already wrote the code if you read the blog from the first step-by-step.Under that class
buildmethod, we will callZegoUIKitPrebuiltVideoConferencewidget with some basic and custom configurations.appSignandappIDwill be called fromDataManagementclass.conferenceID,userID, anduserNameis coming as the params of that class.Want to know how to customize it further in your own way? Here is the clip for you.
🎉 Now Run the project and have fun.
🙋♂️ Want to see the clip of the result? Here is the clip for you.
🙏 Hope that blog helps you. Don't forget to like that blog.
🔮 See the full tutorial video of the project: https://youtube.com/watch?v=5mxaNizy35k&feature=shares
🔥 Source code of the tutorial: https://github.com/SamarpanCoder2002/Video-Calling-in-Flutter
👉 Get 10,000 free mins for the flutter app: https://bit.ly/3GiFEgL
👉 Find out more about ZEGOCLOUD: https://bit.ly/3vepTBl
👉 How to create a video conference app: https://bit.ly/3HYSNNd